
Yesterday on a zoom call someone asked me to explain my process. The clock was ticking, we were closing in on the hour and that’s a big question. So I summed it up by saying “I add, add, add and then I start seeing shapes, decide what the paintings going to be about and then edit.”
Done.
Pop it in a frame and hang it on the wall.
If only it was as simple as that – well actually, if it really was as simple as that wouldn’t it be a little boring. Where’s the adventure?
However - Add, shapes, decide, edit - is it in a nutshell.
Let me demonstrate this by using a painting I did last year.

Beginning stage
This is the VERY beginning stage when I’m just trying to cover the gesso and build the surface. It’s fun, really quick painting and I use some house paint so that I can lay it on more economically.

I start adding large shapes at first trying to make sure I have strong light and dark values.
… then I add, add, add


I know I want a big shape to contrast with all the little complex lines, but how do I want that big shape to look?
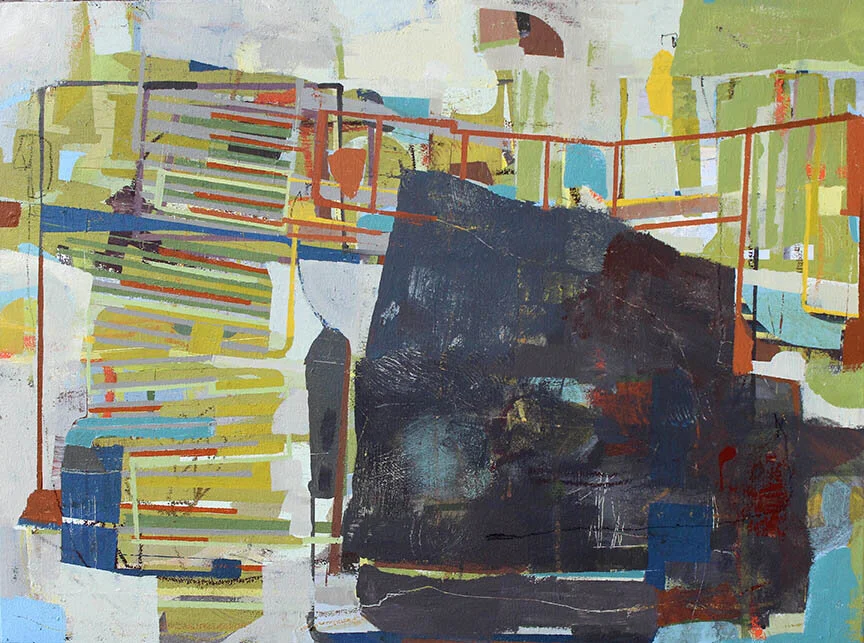


Finally I decide, make a few final adjustments here and there – editing
And it’s finished.


As you can see there’s a lot of decision making, turning, rotating and trying this and that. Finally I discovered I liked it better upside down - that often happens and makes me wonder why I don’t just try painting standing on my head!!!
However, I didn’t sign it on the front as I think it could by hung either way.
Going by the dates on the photos the painting took from 14th June – 29th July to be finished. It was painted alongside 6 others at the same time.
If you want to know more about my process and follow along as I create my paintings make sure you’re signed up for my newsletter. I won’t bombard you with emails – just a weekly informative and sometimes fun update.